Plumbers putty is a very important tool in the plumbing industry, and can be used for many different situations. But sometimes it’s necessary to remove the plumber’s putty from certain areas. As a senior manager of a plumbing company, I understand how difficult this process can be – especially if you don’t have experience with it. In this article, I’m going to share my tips on how to quickly and efficiently remove the grout so that you can maximize your time and get back to work as soon as possible.
This guide will help free up your time by teaching you the best way to remove plumber’s caulk correctly. With just a few simple steps, you’ll be able to effectively remove any traces of the putty and continue working without worry or hassle. The techniques explained here are easy to follow and accessible for everyone who wants to learn more about removing plumber’s putty safely and accurately.
By reading this article, you’ll gain access to an efficient method for removing it quickly and easily. So dive in! Let me show you how liberating it can be when using the right tools and knowledge for successful removal.
What Actually Is Plumbers Putty?
As a senior plumbing manager, I’m sure you’ve come across plumber’s putty in your work. It is a soft, malleable material with various uses for plumbing projects. When applied correctly to the surfaces of sink drains, marble and granite sinks, it can be used to create a watertight seal that will keep liquids from seeping out or coming into contact with the surface. It also provides insulation against vibration and temperature changes.
However, over time, this substance can become harder to remove as it dries out which means it needs to be replaced regularly if you want an effective seal around your fixtures. To remove dried-out plumber’s putty, you’ll need some specialized tools like a putty knife and several rags. With these items at hand, you can start scraping away the hardened sealant and any remaining bits until they’re gone. Once all the old sealant has been removed, use one of those same rags to clean up any residual putty residue left behind on the surface of your drain or sink basin before applying fresh new plumbers’ putty.
Now that we know what plumber’s putty is and how to remove it when necessary, let’s take a look at where it should be used for optimal results.

Where To Use Plumber’s Putty
Now that we know what plumber’s putty is, let’s look at where it can be used. Plumbers often use a plumber’s putty for sealing drain flanges and strainers onto sinks made of porcelain, marble, granite or other materials. It can also be used when installing faucets to the sink deck as well as to seal around tub drains in bathroom settings. The putty comprises a combination of ingredients such as kaolin clay, linseed oil and calcium carbonate which makes it effective for both indoor and outdoor applications.
When using the sealant for any purpose, make sure you apply a thin line along the surface edge or plumbing joint before pressing the fixture into place firmly. This helps to ensure an even distribution and a better seal. If you need to remove dried putty from surfaces like tile or stone, you may have to use a razor blade scraper or chemical stripper depending on the material you are working with. When removing the sealant from metal components, try using mineral spirits first since they are less abrasive and easier to clean up after compared to harsher solvents like paint thinner or acetone. Finally, never use plumber’s putty if your application involves water-soluble glue because this type of adhesive won’t form a strong bond with the putty and will eventually come apart over time due to corrosion caused by exposure to moisture.
What Are The Benefits Of Plumber’s Putty?
Plumber’s putty is an important tool for any professional plumber. It’s a malleable, non-drying sealant that can be used to create watertight seals on things like sinks and drainpipes. Here are the benefits of using it:
- Plumbers use it because it’s easy to work with – you simply knead it into a rope or ball shape before pressing it onto where the leak needs sealing.
- It forms a strong bond when applied correctly and will last for years without needing repairs or replacements.
- Plumber’s putty can come in handy when installing fixtures such as faucets and drains, as it provides a tight seal around them which prevents leaks from occurring in the long run.
Though there are plenty of great uses for plumber’s putty, there are also some instances where you should not use it – such as on granite countertops or natural stone surfaces, since putting too much pressure on these materials may cause cracking or discoloration over time. Additionally, the filler should never be used to seal threaded connections; instead, thread tape should be used for this purpose.
When you want to remove existing plumber’s putty that has been installed previously, your best option is often to cut away what remains with a sharp knife or razor blade, then clean up the area with mineral spirits or linseed oil (although beware that linseed oil can stain certain types of surface). Once all traces of the old putty have been removed and cleaned up properly, new sealant can then be applied if needed.
So while plumber’s putty does offer many advantages when utilized correctly by professionals like myself, we must keep in mind its limitations so that we don’t end up damaging our projects – either during installation or removal! With that being said, let’s look at how we can use it effectively!
How To Use Plumbers Putty?
Removing plumber’s putty can be a daunting task, but with the right tools and some patience it can be done quickly. Just like removing dried paint or glue, removing hardened putty from faucets and other surfaces requires special attention to detail and careful use of the right materials. Plumbers generally use traditional blends of putty that comprise linseed oil, talc, clay, and wax for sealing joints between two objects.
As a senior plumbing manager I have seen countless projects succeed or fail due to improper removal techniques for plumber’s putty – so take your time and do it correctly! With these four easy steps you’ll be able to remove even stubborn dried up putty without damaging your fixtures in no time at all. Now let’s move on to discussing what exactly is in plumbers’ putties?
What’s In Plumbers Putty?
As a senior plumbing manager, I know that plumber’s putty is an incredibly useful tool for many common repairs and installations. Putty comprises of a mixture typically made from linseed oil, clay-like substances such as talc or gypsum powder, fillers like limestone dust, and other ingredients which give it the malleability needed to seal joints in pipes and fixtures. This fantastic sealant is often used around showers, drains, faucets, ceramic tiles and more.
When it comes time to remove a plumber’s putty after installation, there are several steps you can take. If the filler has not yet dried out completely then using mineral spirits should be enough to soften it up so that it can easily be scraped away with a sturdy putty knife or razor blade. For dried plumber’s putty however, you may need to use something stronger than just mineral spirits. In this case try heating up the area with a blow dryer while scraping off the residue with your knife or razor blade – safety first! The heat should help make removal easier by softening up what remains of the putty.
If epoxy was used instead (which happens occasionally) then use paint remover specifically designed for removing epoxy resin along with acetone if necessary depending on how stubbornly stuck down the material is. Finally, always remember to clean up any remaining traces of linseed oil residue left behind after all debris have been removed from the surface being worked upon; this will greatly reduce chances of corrosion occurring over time.
What Is The Difference Between Plumbers Putty & Silicone?
As a senior plumbing manager, it’s important to be able to distinguish between plumber’s putty and silicone. Both of these products can have their place in the toolbox depending on what type of repair you need to do. Plumbers Putty is a soft material that stays malleable after drying, allowing for easy removal from surfaces or fixtures if needed. Silicone, on the other hand, remains flexible and does not harden over time like putty does. Here are some key differences between them:
- Plumbers Putty is non-hardening which means it will remain soft after drying; silicone hardens when exposed to air.
- Silicone provides a better seal than putty due to its flexibility; while putty may provide an initial seal but over time can weaken or break down as it ages.
- Putty has a shorter lifespan than silicone and needs to be replaced more often; however, it’s easier to remove when necessary since putty doesn’t harden like silicone does.
- Silicone is more expensive than plumber’s putty and requires special tools such as caulk guns for application; whereas putty can easily be applied with your hands or tools like plastic spreaders.
These are just some of the main differences between these two materials used by professional plumbers all around the world. As you can see, each one has its own advantages and disadvantages so be sure to assess your project before making any decisions about which product would work best for you. Additionally, make sure you understand how each product works and how it should be removed in case changes are needed down the line – this knowledge could save you time and money!
Step-By-Step Guide On How To Remove Plumbers Putty
Removing the putty after it has been applied for a watertight seal can be a bit challenging to remove. But with the right tools and techniques, removing plumbers’ putty is not as difficult as you think. In this guide I will walk you through how to easily remove plumbers’ putty from any surface.
The first step in removing old or dried-out putty is to use a putty knife to get under the edges of the putty and lift off what you can. If some areas still remain stuck on the surface, then you may need to apply paint thinner or mineral spirits to soften up the remaining material. Be sure to wear protective gloves when working with chemical solvents like these, and keep pets away from them too. Once softened, scrape off what remains using your putty knife, but take care not to scratch or damage the surface below.
If there are stubborn spots that just won’t come off no matter what solvent or scraping technique you use, try applying a few drops of linseed oil directly on top of them. Let it sit for about 20 minutes before trying again with your putty knife; this should loosen things up enough for easy removal without damaging anything beneath it. Some people have even had luck using fish oil instead of linseed oil – give that one a shot if nothing else seems to work!
No matter which method you choose, taking time and patience while removing old plumbers’ putty will make all the difference in ensuring that everything comes off cleanly and efficiently so that you’re ready for installation of new seals quickly and safely.
Step 1: Use Your Bare Hands
As a senior plumbing manager, I often come across many situations where plumber putty has been used and the customer needs to remove it. Fortunately, removing plumber putty is quite easy and can be done with just your bare hands.
The first thing to remember when trying to remove this sturdy material is that the putty creates an incredibly strong seal around any plumbing fixtures or joints. This makes it difficult for paint thinner or mineral spirits to penetrate through the surface of the porous materials; however, using your own strength is usually the best way to get rid of this stubborn material.
With some good leverage and a bit of muscle power, you should be able to break down the bond between the plumbers putty and whatever surface it’s attached to without much difficulty. Of course, if you find yourself struggling with getting this tough material off then there are other ways such as scraping off with a knife or chisel which will also work effectively. But before resorting to those tools make sure you try hand-removal first as it’s generally easier on surfaces and won’t stain them like harsher methods can do.

Step 2: Scrape Off With A Knife Or A Chizel
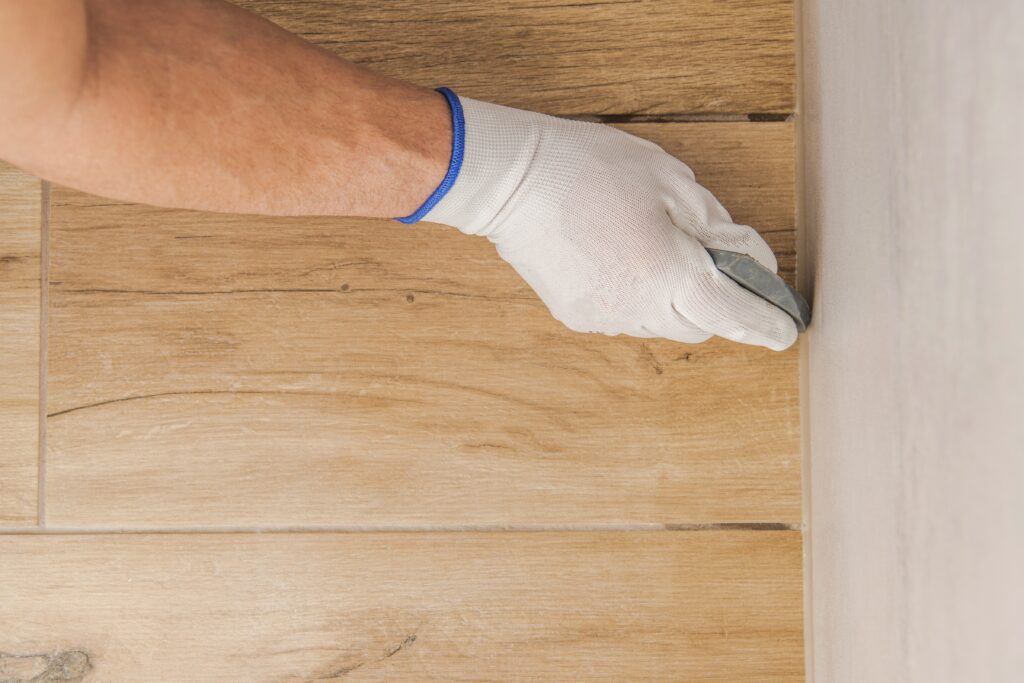
To ensure a successful putty removal, the first step is to scrape it off with a knife or chisel. You’ll want to be sure you have enough pressure to get the job done without causing any damage. Make sure you use a flat blade so you don’t gouge into the surface of whatever material your working on. Be careful not to break apart the larger chunks as they can melt and leave behind residue that will need more work later.
If some of the putty still won’t come off after scraping, try using a heat gun or blow dryer set at low heat for about 30 seconds or until softened. After heating up the putty, take your knife or chisel and continue scraping away any remaining pieces. If there are still small bits left over, use an old toothbrush to brush away these particles. It’s important to remove all traces before proceeding onto Step 3: Using Soapy Water.
Step 3: Using Soapy Water
Removing plumber’s putty can be a difficult task, but with the right tools and methods it is possible! Plumbers putty is used to seal drain assemblies and other various fixtures. Often times you will need to remove excess plumber’s putty. To do this I suggest using soapy water as your go-to method of removal. Here’s how:
| Putty May | Method of Removal |
|---|---|
| Hardened | Scrape |
| Soft | Melt |
| Very Old | Break |
First off, you’ll need to identify what type or blend of putty you’re dealing with in order to properly remove it. Different blends of putty have different properties which require specific techniques for removing them successfully. If the putty has hardened onto an object, then use a sharp tool such as a razor blade or scraper to scrape off the old putty. If the putty is soft enough when touched, then you may be able to melt the putty away by using hot soapy water on top of it until the consistency changes into more liquid form before wiping away from surface area. In cases where the putty may have been applied many years ago and has become extremely hard, then gently trying to crack the putty or break apart pieces at a time would work best here since melting won’t cut it anymore. Once all pieces are removed thoroughly rinse off any remaining residue and pat dry with towel/rag before reapplying fresh new batch of plumber’s putty if needed.
Now that we’ve discussed step 3: Using soapy water let’s move on to breaking down old hardened putty with paint thinner or mineral spirits…
Step 4: Break Down The Putty With Paint Thinner Or Mineral Spirits
As a senior plumbing manager, you know that the sealant can be used to seal a faucet or drain flange. Additionally, it is widely available in the market and usually comprises a mixture of oil and talc. If you want to remove the putty from any area, then knowing how to break down its composition will come in handy.
To start breaking down the remaining putty from the spot, use either paint thinner or mineral spirits as both are effective at dissolving putty. Paint thinners typically contain acetone which is perfect for softening up some of the chemical bonds comprising the putty whereas mineral spirits contain petroleum distillates and hydrocarbons making them powerful solvents for breaking apart the components of plumber’s putty.
For applying these liquids on your drain flange effectively without creating an awful mess, I suggest using cotton swabs or nails dipped in liquid solvent like thinners to soften the putty up and wipe away excess putty material. Here’s a list of what you need:
- Cotton swab/nail
- Paint Thinner/Mineral Spirits
- Container/Bowl
- Cleaning Cloth
Now you know how to break it down with paint thinning or mineral spirits! Before proceeding ahead though make sure all traces of this solvents have been removed before moving onto Step 5 because they may damage certain materials if left overnight.
Step 5: Heat Up The Putty With A Heat Gun
As mentioned in the previous step, paint thinner or mineral spirits can break the old putty down. But if you’re working with marble and granite, or other sink materials that can not tolerate solvents, a heat gun is also great for removing putty from the rim of a sink or drain assemblies to sinks. In this case study example, we’ll be using a heat gun to remove the remaining residue under the bottom edge of our sink flange.
| Heat Gun | Pliers |
|---|---|
| Safety glasses | Putty knife |
| Respirator mask | Rag/Paper towel |
| Gloves | Mineral oil |
First things first: safety comes first when handling any type of tool – so make sure to wear gloves, eye protection (safety glasses), and respirator mask during this process in order to protect yourself from potential health risks associated with fumes released by heating up putty. Now let’s get started! Use your heat gun on low setting and start slowly warming up the area where the putty needs to be removed. Warming it up will soften it enough so that you can use something like a putty knife or pliers to gently pull back at it as you move around its edges until all traces are gone. Once done, take a rag soaked in some mineral oil over the surface area where the old putty was located; this helps ensure all traces have been fully removed from both surfaces before replacing them together again.
All-in-all, plumbers putty can come in handy when dealing with issues related to drains and faucets but knowing how to properly remove it is just as important – especially when working with delicate materials such as marble or granite. With these steps in mind, getting rid of stubborn plumbers putty should no longer seem like an insurmountable task and allow you to continue your project without delay.
Frequently Asked Questions
How Long Does It Take To Remove Plumbers Putty?
Removing plumbers putty can feel like a nightmare. It’s an arduous task that takes forever, and it seems like no matter how much time you invest in it – the putty just won’t come off! As a senior plumbing manager, I’ve seen my fair share of this sticky mess and don’t recommend anyone tackle such tricky work without due diligence.
To begin with, let me tell you something about the grout / filler: it’s stubbornly resistant to removal. If you think getting rid of silicone is bad, wait until you try taking it out! Every second spent on scraping off the residue feels like hours because its grip is so strong. You’ll be left sweating from all your efforts by the end of the day.
Now here comes the most important point: how long does it take to remove it? Well, depending on what type of surface you’re working with and how thickly applied the material was – removing plumbers putty can range anywhere from 30 minutes up to several hours or even days! My advice would be to start early if you want to make sure everything gets done in one go rather than having to spend multiple sessions trying to get rid of all traces of the stuff.
The key takeaway here is that patience is essential when dealing with plumbers putty; if you rush things then chances are you won’t have successful results. Make sure that whatever tools or techniques you choose for removal are gentle enough not to damage any underlying surfaces but tough enough to break through the layers of adhesive glue-like material that has been deposited around your fixture areas.
Are There Alternatives To Plumbers Putty?
Are there alternatives to plumbers putty? As a senior plumbing manager, I’m often asked this question. It has many advantages, but it’s not the only option when it comes to protecting and sealing your pipes and fixtures. For instance, silicone caulk is another great choice that can provide more longevity than putty.
Silicone caulk forms a waterproof seal around the fixture or pipe, providing better protection from leaks and seepage over time. It also allows for greater flexibility where larger objects may need to be worked in or out of the area being sealed. Additionally, silicone caulk won’t harden with age like plumbers putty does and isn’t as difficult to clean up after you’re done using it.
That said, both products have their place in professional home maintenance work – depending on what type of job you’re trying to complete. Silicone caulk is ideal for sinks and bathtubs while it works best when used with drainpipes or other metal surfaces because its malleable nature makes it easier to get into tight spots without creating gaps between pieces. Ultimately, the decision should come down to cost effectiveness versus performance – whichever product offers the most benefit in each particular situation should be your go-to solution!


